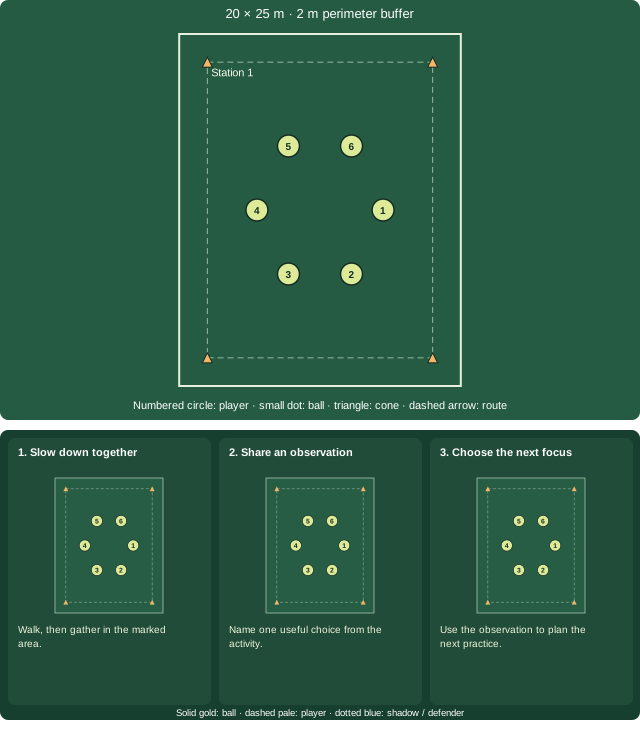
Prepare the first decision
10 minPlayers this activity: 1, 2, 3, 4, 5, 6 · 6 attending
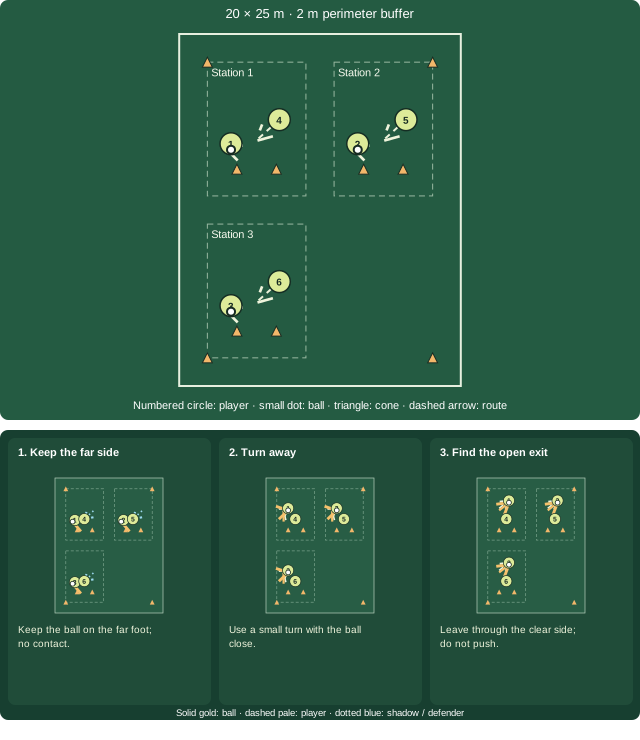
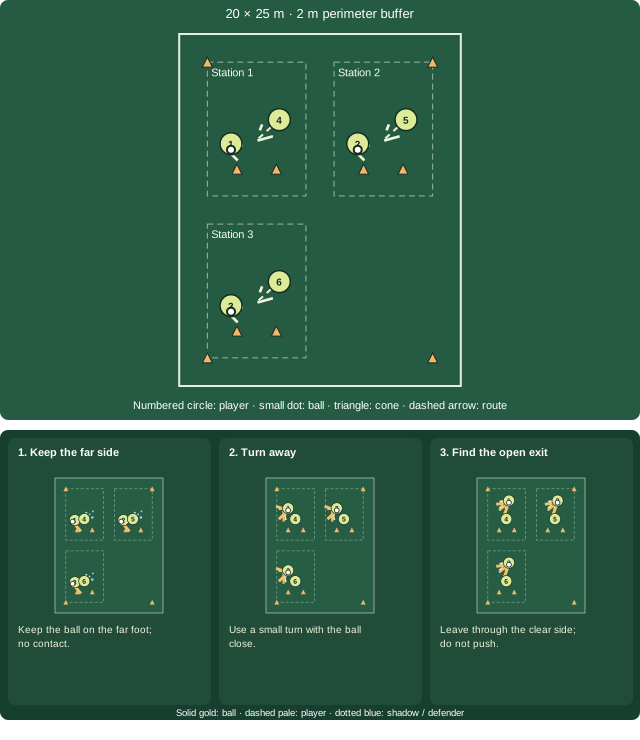
Begin at walking pace in the numbered stations. Stand beside a still ball; point to the far side of an imaginary shadow and move the ball there. Share the ball when needed; an observer watches the same decision and takes a ball turn on the next assigned round.
Side on; ball on the far foot. The body angle changes without backing into the shadow.
Run the activity
- Stand beside a still ball; point to the far side of an imaginary shadow and move the ball there.
- Pause on a raised hand and point to the space you chose.
- Swap the ball on the round signal and notice this feature: The body angle changes without backing into the shadow.
Play
- Stand beside a still ball; point to the far side of an imaginary shadow and move the ball there.
- Ground play only. No heading, sliding, body contact or tackles at a player's feet. Intercept loose ground passes only. Offer water or a pause whenever needed.
Watch for
The body angle changes without backing into the shadow.
If you see: The carrier leans or extends an arm toward the partner.
Try: Reset the gap; use feet and a sideways body position to keep the ball away.
Organisation
3 separate stations. Roles: carrier and receiver / shadow; extra players observe. Advance one slot each round. 2 turns cover every player. A first carrier turn can take up to 60s of activity. Waiting is active observation; add balls or reduce group size if it becomes too long.
7 rounds × 60 seconds. Timing: 420s activity · 60s briefing · 60s rest · 60s transition.
Adjust the challenge
Easier: The shadow remains still and the carrier places the ball on the far side.
Next step: The shadow changes side once while the carrier turns.
Move on: Stop the balls and identify the start positions for shadow shields.
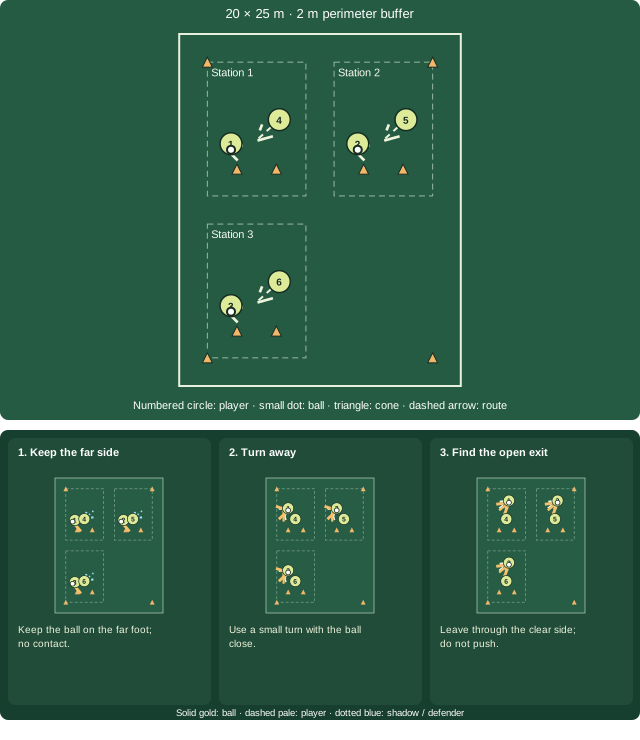
20 × 25 m clear area with a 2 m perimeter buffer. 3 numbered stations, 6 numbered player slots, 3 balls and 10 cones. Each station shares one ball and rotates roles; dashed arrow shows an example travel or pass route. Focus: Keep the ball on the side away from an opponent. Diagram shows starting positions, not fixed player locations. Three steps show shield exit using the first round's numbered players. Solid gold routes show the ball; dashed pale routes show player movement; dotted blue routes show a shadow or defender. Routes stay inside each numbered station. 1. Keep the far side: Keep the ball on the far foot; no contact. 2. Turn away: Use a small turn with the ball close. 3. Find the open exit: Leave through the clear side; do not push.
Round-by-round player roles
| Round | Assignments |
|---|---|
| 1 · 60s | 1: carrier (station 1); 4: receiver / shadow (station 1); 2: carrier (station 2); 5: receiver / shadow (station 2); 3: carrier (station 3); 6: receiver / shadow (station 3) |
| 2 · 60s | 1: receiver / shadow (station 1); 4: carrier (station 1); 2: receiver / shadow (station 2); 5: carrier (station 2); 3: receiver / shadow (station 3); 6: carrier (station 3) |
| 3 · 60s | 1: carrier (station 1); 4: receiver / shadow (station 1); 2: carrier (station 2); 5: receiver / shadow (station 2); 3: carrier (station 3); 6: receiver / shadow (station 3) |
| 4 · 60s | 1: receiver / shadow (station 1); 4: carrier (station 1); 2: receiver / shadow (station 2); 5: carrier (station 2); 3: receiver / shadow (station 3); 6: carrier (station 3) |
| 5 · 60s | 1: carrier (station 1); 4: receiver / shadow (station 1); 2: carrier (station 2); 5: receiver / shadow (station 2); 3: carrier (station 3); 6: receiver / shadow (station 3) |
| 6 · 60s | 1: receiver / shadow (station 1); 4: carrier (station 1); 2: receiver / shadow (station 2); 5: carrier (station 2); 3: receiver / shadow (station 3); 6: carrier (station 3) |
| 7 · 60s | 1: carrier (station 1); 4: receiver / shadow (station 1); 2: carrier (station 2); 5: receiver / shadow (station 2); 3: carrier (station 3); 6: receiver / shadow (station 3) |
Equipment: 3 balls · 10 cones · 0 goals
Round-by-round player roles
C = carrier · R = receiver / shadow. Times are activity seconds; briefing, rest and transition are separate.
| Player | Station | R1 60s | R2 60s | R3 60s | R4 60s | R5 60s | R6 60s | R7 60s |
|---|---|---|---|---|---|---|---|---|
| 1 | 1 | C | R | C | R | C | R | C |
| 2 | 2 | C | R | C | R | C | R | C |
| 3 | 3 | C | R | C | R | C | R | C |
| 4 | 1 | R | C | R | C | R | C | R |
| 5 | 2 | R | C | R | C | R | C | R |
| 6 | 3 | R | C | R | C | R | C | R |